Copy of Article Text Below
.....Harold Wood, Essex. Tel: Harold Wood 40096. After tapping the thread in both holes the calipers can then be assembled as previously described.
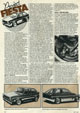
Moving to the rear of the car the shock absorbers are replaced with the new Bilstein units and these just bolt straight in. Ford recommend using standard rear springs although we found that by using the rally type springs from RS they raise the rear of the car about 1V2" and allow a larger than stock wheel and tyre to be fitted without making any mods to the bodywork. The only disadvantage of using stiffer springs at the rear is that the ride suffers somewhat.
With all four corners taken care of suspension wise we can get back to the engine. Hoist it back in to the car, tap in the drive shafts and refit the engine crossmember, etc.
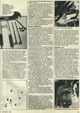
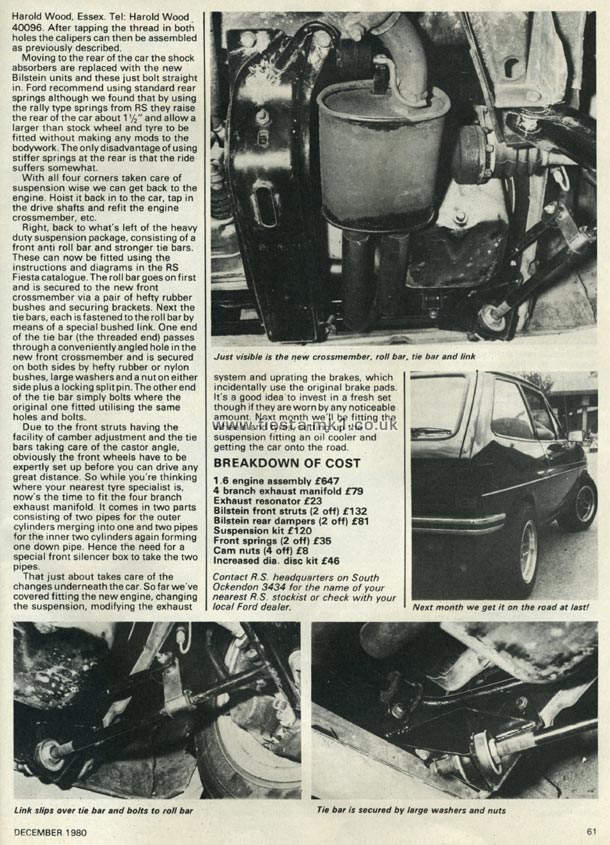
Right, back to what's left of the heavy duty suspension package, consisting of a front anti roll bar and stronger tie bars. These can now be fitted using the instructions and diagrams in the RS Fiesta catalogue. The roll bar goes on first and is secured to the new front crossmember via a pair of hefty rubber bushes and securing brackets. Next the tie bars, each is fastened to the roll bar by means of a special bushed link. One end of the tie bar (the threaded end) passes through a conveniently angled hole in the new front crossmember and is secured on both sides by hefty rubber or nylon bushes, large washers and a nut on either side plus a locking split pin. The other end of the tie bar simply bolts where the original one fitted utilising the same holes and bolts.
Due to the front struts having the facility of camber adjustment and the tie bars taking care of the castor angle, obviously the front wheels have to be expertly set up before you can drive any great distance. So while you're thinking where your nearest tyre specialist is, now's the time to fit the four branch exhaust manifold. It comes in two parts consisting of two pipes for the outer cylinders merging into one and two pipes for the inner two cylinders again forming one down pipe. Hence the need for a special front silencer box to take the two pipes.
That just about takes care of the changes underneath the car. So far we've covered fitting the new engine, changing the suspension, modifying the exhaust system and uprating the brakes, which incidentally use the original brake pads. It's a good idea to invest in a fresh set though if they are worn by any noticeable amount. Next month we'll be fitting the wheels and tyres, setting up the suspension fitting an oil cooler and getting the car onto the road.
BREAKDOWN OF COST
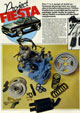
1.6 engine assembly £647
4 branch exhaust manifold £79
Exhaust resonator £23
Bilstein front struts (2 off) £132
Bilstein rear dampers (2 off) £81
Suspension kit £120
Front springs (2 off) £35
Cam nuts (4 off) £8
Increased dia. disc kit £46
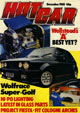
Contact R.S. headquarters on South Ockendon 3434 for the name of your nearest R.S stockist or check with your local Ford dealer.
Captions -
Middle - Just visible is the new crossmember, roll bar. tie bar and link
Middle-Left - Next month we get it on the road at last!
Bottom-Left - Link slips over tie bar and bolts to roll bar
Bottom-Right - Tie bar is secured by large washers and nuts
|