Copy of Article Text Below
.....and these should be used to get a good colour match.
Both the undercoat/primer and top coat are supplied ready for use and don't need thinning. In practice, however, I found the paint easier to apply if thinned out slightly. I checked with Sherwood Parsons before I did this to make sure it was quite safe to do and wouldn't affect the finish.
As I'm no Rembrandt when it comes to painting, I practised on an old door panel before having a go on the car.
This was time well spent as I made one or two lash ups before I got the right paint thickness, and method of application. I soon found that I got runs and sags if I hurried as well as brush marks. But when I took my time the finish was surprisingly good.
There are just two more chores to perform before tackling the car. The first is to give the rubbed down surface a good wipe over with a clean cloth soaked in Re-Paint thinners. This makes sure all traces of grease are removed from the surface.
The second is to rub the car over with a Tack cloth. This is a form of muslin cloth that has been impregnated to make it sticky. It removes any bits of dust that may have settled on the body.
It's also worthwhile wetting the garage floor to ensure that no dust lands on the paint while you're moving around.
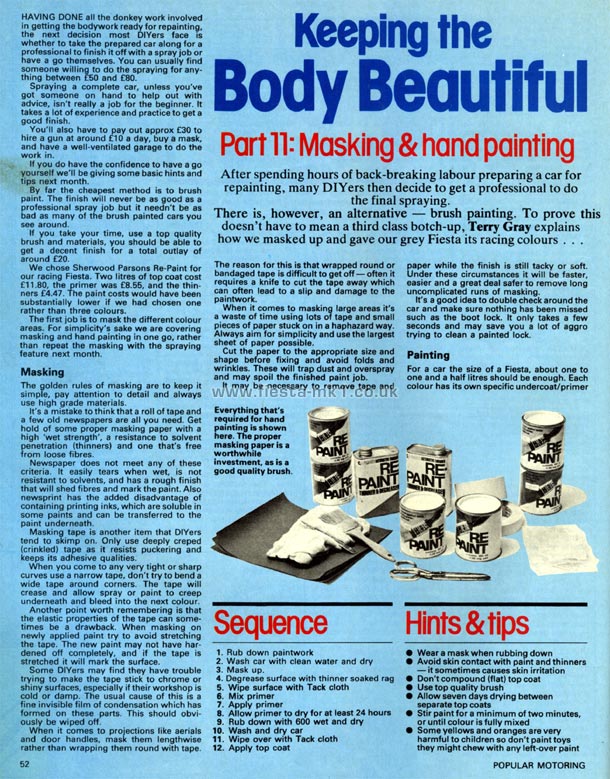
Having taken all the necessary precautions the next step is to apply the primer. Use the best brush you can buy - a cheap one will shed its bristles and leave brush marks. I found a two inch brush to be ideal.
The instructions supplied with the paint advised starting with the roof, then the bonnet, the boot, nearside front wing, the door and rear wing. We followed the same sequence on the offside.
Only tackle one panel at a time so that each can be finished before the paint starts to go off. It's best to apply the paint evenly and in the same direction all the time to avoid brush marks.
The primer/undercoat should be allowed to dry overnight and then checked for any spots that may have been missed.
Next job is to rub down the primer with 600 wet and dry, wash with clean water, dry and give the surface the once over with the Tack cloth again.
The top coat should be applied in the same way as the primer, ensuring a liberal coverage, whilst at the same time avoiding runs.
Re-Paint will be touch dry in about an hour but should be left at least eight hours to harden off. During this time the car should be kept out of any bright sunlight or adverse weather conditions.
Another top coat can be applied after seven days if necessary, although if the first one has gone on correctly it shouldn't be needed.
The final coat shouldn't be rubbed down and avoid polishing for at least a month to allow the paint under the surface to fully harden.
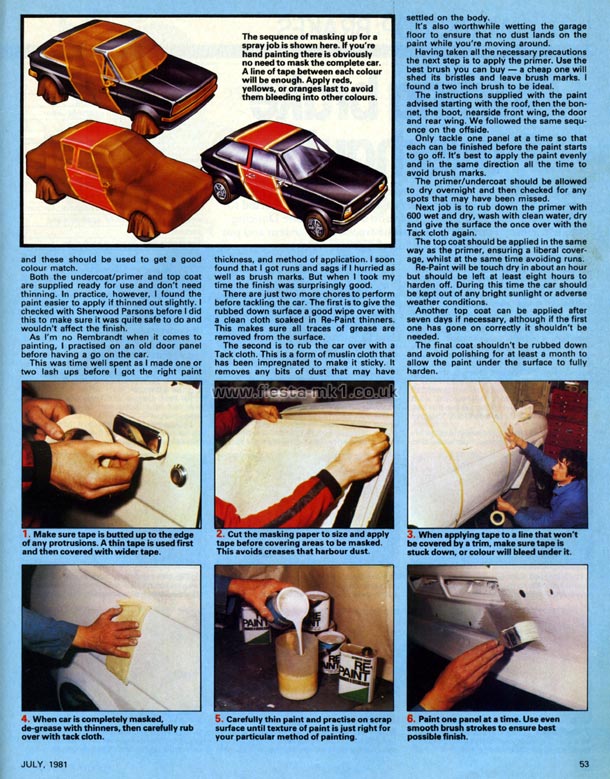
1. Make sure tape is butted up to the edge of any protrusions. A thin tape is used first and then covered with wider tape.
2. Cut the masking paper to size and apply tape before covering areas to be masked. This avoids creases that harbour dust.
3. When applying tape to a line that won't be covered by a trim, make sure tape is stuck down, or colour will bleed under it.
4. When car is completely masked, de-grease with thinners, then carefully rub over with tack cloth.
5. Carefully thin paint and practise on scrap surface until texture of paint is just right for your particular method of painting.
6. Paint one panel at a time. Use even smooth brush strokes to ensure best possible finish.
Captions -
Top - The sequence of masking up for a spray job is shown here. If you're hand painting there is obviously no need to mask the complete car. A line of tape between each colour will be enough. Apply reds, yellows, or oranges last to avoid them bleeding into other colours.
|