Copy of Article Text Below
Fiesta with the lid off
It was a bit of a grind, but Ford's 'easier-to-service' model proved as simple as they claim, says Rodney Jacques.
NOT SO MANY YEARS ago top overhauls were a regular part of the motoring scene with many cars requiring this service at anytime between 6 and 10,000 mile intervals. Nowadays, with much cleaner fuel and better sealing of the valve guides and pistons, not to mention improved valve materials it is, thankfully, required far less frequently.
If you should be the owner of a V12 Jaguar or a sixteen valve Triumph you are no doubt delighted that this is so, for owners of less, exotic machinery but with shim type valve* adjustment, decokes can still be a chore not to be undertaken lightly.
When Fords introduced the Fiesta, they stated in their publicity handouts that part of the design criteria was to make servicing easier and less expensive. Certainly at the top of the engine, while utilizing modern technological improvements they have retained the simplicity common to many of those earlier cars, and a top overhaul on this baby Ford is well within the scope of even the less adventurous diy motorist.
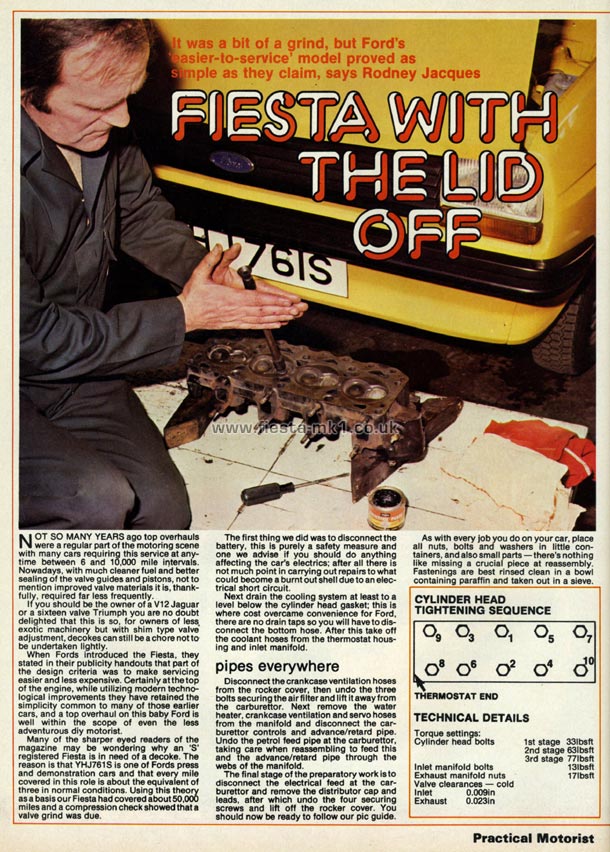
Many of the sharper eyed readers of the magazine may be wondering why an 'S' registered Fiesta is in need of a decoke. The reason is that YHJ761S is one of Fords press and demonstration cars and that every mile covered in this role is about the equivalent of three in normal conditions. Using this theory as a basis our Fiesta had covered about 50,000 miles and a compression check showed that a valve grind was due.
The first thing we did was to disconnect the battery, this is purely a safety measure and one we advise if you should do anything affecting the car's electrics; after all there is not much point in carrying out repairs to what could become a burnt out shell due to an electrical short circuit.
Next drain the cooling system at least to a level below the cylinder head gasket; this is where cost overcame convenience for Ford, there are no drain taps so you will have to disconnect the bottom hose. After this take off the coolant hoses from the thermostat housing and inlet manifold.
pipes everywhere
Disconnect the crankcase ventilation hoses from the rocker cover, then undo the three bolts securing the air filter and lift it away from the carburettor. Next remove the water heater, crankcase ventilation and servo hoses from the manifold and disconnect the carburettor controls and advance/retard pipe. Undo the petrol feed pipe at the carburettor, taking care when reassembling to feed this and the advance/retard pipe through the webs of the manifold.
The final stage of the preparatory work is to disconnect the electrical feed at the carburettor and remove the distributor cap and leads, after which undo the four securing screws and lift off the rocker coyer. You should now be ready to follow our pic guide.
As with every job you do on your car, place all nuts, bolts and washers in little containers, and also small parts - there's nothing like missing a crucial piece at reassembly. Fastenings are best rinsed clean in a bowl containing paraffin and taken out in a sieve.
TECHNICAL DETAILS
Torque settings: Cylinder head bolts
- 1st stage 33lbsft
- 2nd stage 63lbsft
- 3rd stage 77lbsft
Inlet manifold bolts - 13lbsft
Exhaust manifold nuts - 17lbsft
Valve clearances - cold
Inlet - 0.009in
Exhaust - 0.023in
|